Last updated: August 11, 2026
- What Habitability Actually Means, and Why Most People Miss It Habitability is not a glossy standard.
- People often miss one thing: habitability is about function, not appearance.
- Habitability starts long before design does.
- Good habitability work is often boring in the best way.
Quick Answer: habitability and repairs usually come down to seven core checks — heat, water, electricity, sanitation, structure, ventilation, and safety — and once one of those fails, the repair stops being optional. Habitability repairs — complete guide starts with function, not appearance; this habitability repairs — complete guide lays out what to look for, what to report, and when to get help. Short version? A working unit matters.
Habitability and repairs are really one conversation: a home, apartment, or rental unit that is not safe, dry, heated, ventilated, and usable needs attention, not excuses. This habitability repairs — complete guide explains what “habitable” usually means, how to tell a minor defect from a real habitability problem, and what a proper repair process looks like from first report to final sign-off. In practice, the question is whether the unit still meets basic use and safety standards. Simple. Or not.
What Habitability Actually Means, and Why Most People Miss It
Habitability is not a glossy standard. It is the bare minimum a dwelling needs so someone can live there without unreasonable risk. That usually means working heat, safe water, functioning plumbing, electricity that does not endanger the occupants, weather protection, locks, and no serious hazards such as active leaks, sewage backups, pest infestations, or structural failures. Local law sets the exact rule set, but the pattern stays the same: a habitable unit protects health and basic use.
People often miss one thing: habitability is about function, not appearance. A wall can look freshly painted and still hide mold from a leak. A stove can look modern and still be unsafe if gas connections leak. A bathroom can shine and still fail if the toilet won’t flush or the shower drains into the floor. The key here is how the element works under ordinary use — not how pretty it looks. Cosmetic and critical are not the same beast.
For the legal frame, the U.S. Department of Housing and Urban Development discusses housing quality standards, and your state or city code may be stricter: https://www.hud.gov/program_offices/public_indian_housing/programs/hcv/housingqualitystandards. For landlord-tenant rights, many readers also benefit from the National Center for State Courts and local tenant resource pages, though those vary by jurisdiction. For a federal overview of tenant rights in public housing and housing choice vouchers, see HUD’s public housing resources: https://www.hud.gov/topics/rental_assistance.
I’d use these as the first questions to ask, but when you are unsure, consult a qualified local inspector, housing attorney, or code enforcement office:
| Question | What you are checking | Why it matters |
|---|---|---|
| Is there heat, water, power, and sanitation? | Basic utilities and fixtures | Without them, the unit may be unusable |
| Is there a leak, mold, rot, or infestation? | Damage that spreads or affects health | These worsen if ignored |
| Is there a safety hazard? | Exposed wiring, gas smell, loose railings, broken locks | Safety defects often need urgent action |
| Is the problem cosmetic only? | Chips, scuffs, faded paint | Cosmetic issues are usually not habitability issues |
Who this is not for: if you are only trying to choose paint colors, cabinet hardware, or nicer flooring, this is the wrong guide. Habitability starts long before design does.
The Correct Way to Inspect a Unit for Habitability and Repairs — Step by Step

A proper inspection is not a quick walk-through with a phone flashlight and a shrug. It is a systematic check of the systems people rely on every day. Skip the sequence, and you miss the clue that explains the damage. A ceiling stain is not the problem; it is the footprint.
- Start at the outside envelope. Check roof edges, gutters, downspouts, siding, windows, doors, grading, and visible foundation areas. What to check: missing shingles, pooling water, cracked seals, gaps, rust, rot, or places water can enter. What not to do: assume interior paint tells you the exterior is fine.
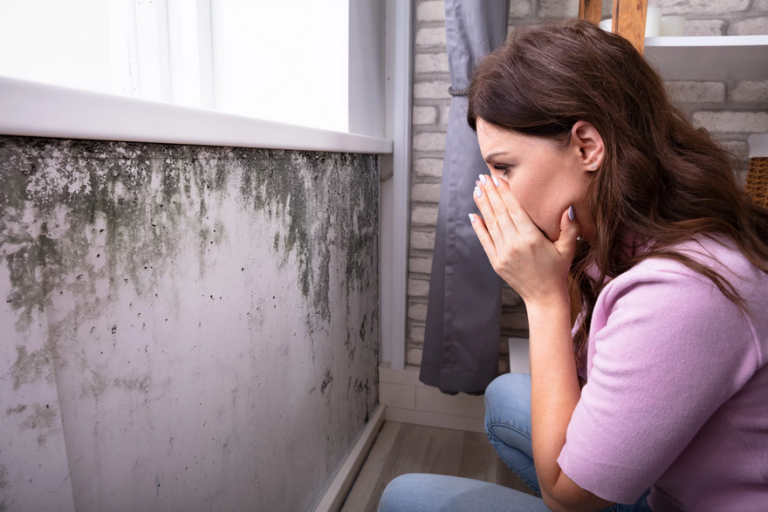
- Move to the interior shell. Look at ceilings, walls, baseboards, floors, and corners in every room. What to check: stains, bubbling paint, soft drywall, warped flooring, musty odor, or visible mold growth. What not to do: call it “old damage” without finding the source.
- Test plumbing fixtures one by one. Run sinks, shower, tub, toilet, and any dishwasher or laundry hookup. What to check: water pressure, drainage speed, leaks under sinks, running toilets, reverse flow, and hot water delivery. What not to do: stop after a five-second test.
- Check electrical safety. Turn on lights, test outlets, and look for scorch marks, loose covers, tripped breakers, or flickering. What to check: stable power and no signs of overheating. What not to do: touch exposed wiring or ignore repeated breaker trips.
- Verify heating, cooling, and ventilation. Run the system if the season allows, open bathroom fans, and look for blocked vents. What to check: air movement, heat output, strange smells, noise, or condensation. What not to do: claim a unit is “fine” because one room feels comfortable.
- Inspect safety features and access points. Check smoke alarms, carbon monoxide alarms where required, handrails, stairs, locks, and window operation. What to check: working alarms, secure locks, stable railings, and exits that open correctly. If anything seems off, consult a licensed electrician, fire-safety professional, or local building inspector. What not to do: leave safety devices for “later.”
- Document everything clearly. Photograph with context, note room and date, and describe the defect in plain language. What to check: whether the record would make sense to a stranger. What not to do: rely on vague notes like “bad bathroom.”
The key here is exact location and the path of damage — a water mark above a window often points to flashing, siding, or roof failure, not the paint itself. That is what separates a real diagnosis from a cosmetic patch.
The Correct Way to Report a Repair and Push It to Completion — Step by Step
The easiest way to lose a valid repair is to report it badly. A clear report does three jobs at once: it tells the owner or manager what is broken, shows why it matters, and creates a record that can be followed later. Should you be a tenant, that record can matter a great deal. Should you be a property manager or owner, it keeps small defects from becoming expensive failures.
- Write the problem in one sentence. State the room, fixture, and symptom. What to check: “The kitchen sink leaks under the trap when the faucet runs.” What not to do: “Kitchen issue” or “needs attention.”
- Add the impact. Explain how it affects use or safety. What to check: whether the leak stops use of the sink, causes slipping, or risks cabinet damage. What not to do: exaggerate; keep it accurate.
- Include evidence. Send photos or short video, plus date and time. What to check: that the image shows scale, location, and the actual defect. What not to do: send a close-up that could be anywhere.
- Ask for a specific action. Name the needed repair if you know it, or ask for inspection and repair. What to check: that the request is direct and readable. What not to do: prescribe a fix you do not understand.
- Set a follow-up interval. Should there be no reply, send a polite reminder and keep the thread in one place. What to check: the date of each message and response. What not to do: scatter the conversation across texts, calls, and random notes with no record.
- Escalate when the problem is urgent or ignored. Use the landlord, manager, maintenance line, building owner, housing authority, or local tenant office as appropriate. What to check: the proper escalation path in your area. What not to do: jump straight to threats if a formal step is required first.
- Confirm completion in person. Test the fixture or area again after the repair. What to check: that the original symptom is gone and no new damage was caused. What not to do: accept “fixed” without verifying it.
The part everyone gets wrong is the handoff. Repairs fail most often when the original report is vague, the diagnosis is guessed, or the final check is skipped. A landlord may send a plumber for a leak, but if the real issue is a failed seal behind a cabinet, the leak comes right back.
| Repair request element | Good version | Weak version |
|---|---|---|
| Problem statement | Exact room, fixture, symptom | “Need help” |
| Evidence | Dated photos or video | No record |
| Urgency | Notes safety or loss of use | “Whenever” |
| Follow-up | One thread, dated reminders | Scattered messages |
| Completion check | User retests the issue | Assumes it worked |
Before vs. After: What Good Habitability and Repairs Actually Look Like

The difference between a livable unit and a troubled one is not always dramatic. More often, it is a stack of small details that keep repeating. Before repair, the unit shows symptoms: moisture, odor, instability, or unreliable systems. After repair, the same areas are dry, steady, and consistent.
Think of a ceiling stain. Before: the stain expands after rain, paint peels at the edge, and the drywall feels soft. After: the leak source is corrected, the material is dry, the stain is sealed only after the cause is fixed, and the area stays stable through the next storm. The key here is the sequence of repair — the source gets handled before the finish goes back on. That is what separates a true fix from a cover-up.
Here is a practical before-and-after comparison:
| Area | Before | After |
|---|---|---|
| Roof or ceiling | Active stain, sagging, dampness | Dry surface, no new discoloration after rain |
| Plumbing | Drip, slow drain, odor, standing water | Tight joints, normal drainage, no leaks |
| Electrical | Flicker, tripped breaker, scorch marks | Stable power, intact covers, no heat marks |
| Heat/ventilation | Cold rooms, stale air, condensation | Even airflow, functioning vents, less moisture buildup |
| Entry and security | Broken lock, loose door, draft | Door closes properly, lock engages, gaps sealed |
| Flooring and walls | Soft spots, rot, peeling from moisture | Firm surfaces, damage repaired at source |
I’d be cautious about one common mistake: a repair that makes the surface look better without solving the cause. Fresh caulk over a leaking tub edge may hold for a while, but if the gap keeps moving or the drain assembly is failing, the problem comes back. Good habitability work is often boring in the best way. It clears up uncertainty. It doesn’t keep inventing a new story every week.
Should you be deciding whether a defect is serious enough to pursue, ask: does the problem affect sleeping, cooking, bathing, sanitation, heating, safety, or the building envelope? If yes, you are no longer in decorative territory.
The Detail Everyone Gets Wrong: Moisture, Mold, and Hidden Damage
The mistake I see most often in habitability conversations is treating moisture as a surface issue. It isn’t. Water moves into cavities, under flooring, behind cabinets, into insulation, and along framing. By the time you see a stain, the damage may be larger than the visible mark. That is why a “just repaint it” response can be wrong, even when it feels efficient.
A proper moisture response starts with finding the entry point and stopping it. Only after the area is dry and the damaged material is removed should the surface be restored. Should mold be present, the work may need professional judgment, especially if the affected area is large, recurring, or tied to hidden structure. For health-related concerns, it is wise to consult a qualified professional, and if the issue is severe or widespread, local public health guidance can help. The U.S. Environmental Protection Agency has practical mold resources here: https://www.epa.gov/mold.
Here is the sequence I would follow:
- Find the wet pattern. Trace stains, odors, or swelling to the highest likely point. What to check: whether the source is above, behind, or adjacent. What not to do: stop at the stain itself.
- Stop the source. Repair the leak, overflow, failed seal, or drainage problem. What to check: no new water after the source is corrected. What not to do: dry around an active leak.
- Remove damaged material if needed. Wet drywall, rotted trim, or saturated insulation may need replacement. What to check: whether the material can actually dry and remain sound. What not to do: seal in rotten or moldy material.
- Dry the cavity and monitor it. Allow adequate drying time and watch for rebound moisture. What to check: stable dryness, no odor return, no fresh staining. What not to do: reinstall finishes too soon.
- Restore only after the cause is solved. Replace, patch, prime, and paint. What to check: that the repair is happening after the system is stable. What not to do: hide the problem under cosmetic finish.
- Reinspect after the next rain, shower cycle, or appliance use. What to check: whether the issue returns under real conditions. What not to do: declare victory after one dry day.
This is also where honesty matters. Some damage is beyond a quick patch. If rot has reached framing, if mold keeps returning, or if the source cannot be isolated, the correct answer may be a larger repair plan, not a handyman fix.
How to Decide Between DIY, Maintenance, or Professional Repair
Not every problem needs a contractor, but not every problem is safe to improvise. The right choice depends on risk, hidden damage, and whether the repair touches utilities or structure. Cosmetic work can often wait or be handled in-house. Habitability defects usually cannot.
A simple rule helps: should the work could cause shock, fire, gas exposure, sewage exposure, structural instability, or hidden moisture to spread, it belongs with a qualified professional. Should it be surface-level and low risk, a maintenance tech or careful owner may handle it. If the issue is recurring, that is a clue the cause has not been found.
| Type of issue | Usually reasonable to handle | Usually needs a pro |
|---|---|---|
| Loose cabinet hinge | Yes | No |
| Small drywall patch after a solved leak | Yes, with care | Maybe if widespread |
| Dripping faucet | Sometimes | If valve work is needed |
| Persistent ceiling stain | No | Yes |
| Faulty outlet, sparking, repeated breaker trip | No | Yes |
| Sewer backup or gas odor | No | Yes, urgently |
| Broken lock or screen | Often | Not usually, unless security hardware is complex |
The detail everyone gets wrong here is timing. People wait until a small issue becomes a system failure. A dripping pipe under a sink looks minor until the cabinet swells, the subfloor softens, and the odor turns into a tenant complaint. The cheapest repair is usually the one done before water, heat, or movement damages something else.
I wouldn’t treat budget as the only factor. A cheap repair that fails in a month is expensive. A correct repair that solves the source is often the better value, even if it takes more steps.
What Good Repair Records Look Like, and Why They Matter
Repair records are not paperwork for paperwork’s sake. They are the building’s memory. When a problem repeats, records show whether it was reported, how long it took, what was fixed, and whether the same defect came back. That matters for owners, managers, tenants, inspectors, and anyone trying to decide if the property is safe.
A good record is plain, dated, and specific. It should answer: what broke, where it was, when it was reported, what action was taken, and whether the problem was verified as resolved. Photos help, but the words matter too. A photo without a label can be hard to place later.
Use a simple structure like this:
- Record the date and time. What to check: the first notice and each follow-up. What not to do: rely on memory.
- Name the location precisely. Room, wall, fixture, or system. What to check: anyone else could find it from your note. What not to do: write “upstairs issue.”
- Describe the symptom. Leak, noise, smell, heat loss, electrical failure, or visible damage. What to check: the actual observable problem. What not to do: speculate without evidence.
- Note the impact. Safety risk, loss of use, or spreading damage. What to check: why the issue matters now. What not to do: overstate for effect.
- Log the response. Who answered, what they promised, and when. What to check: whether a next step was